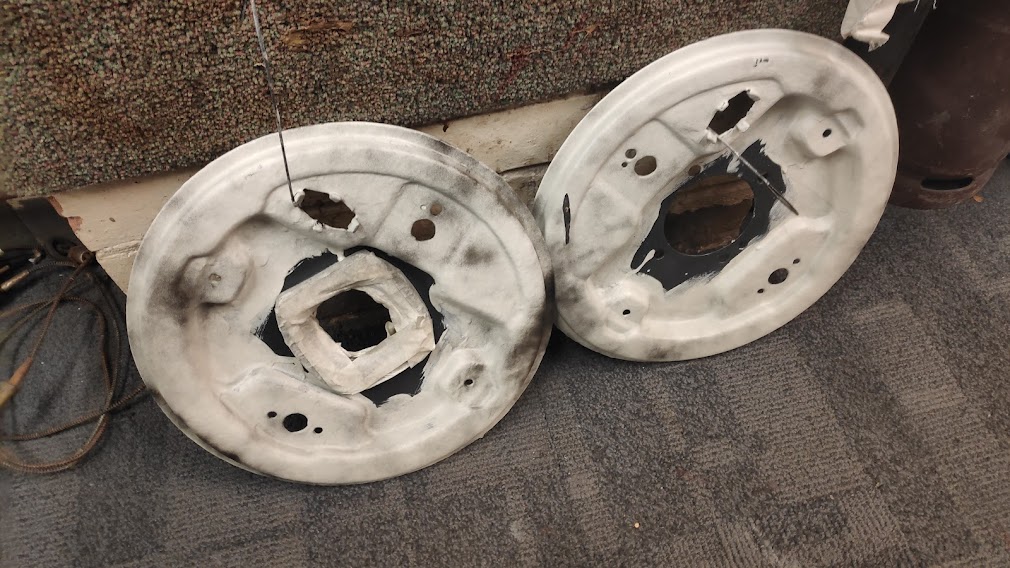
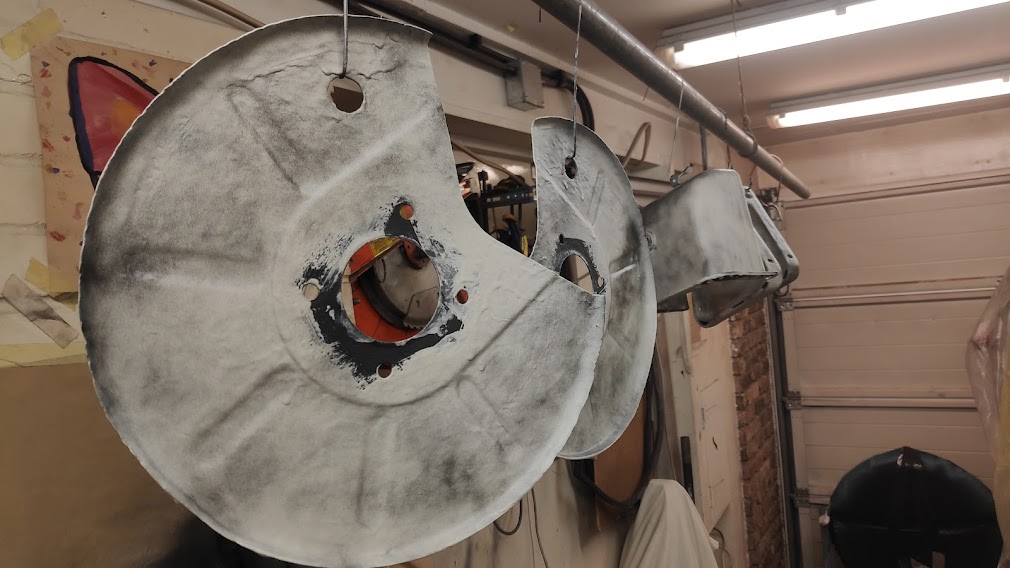
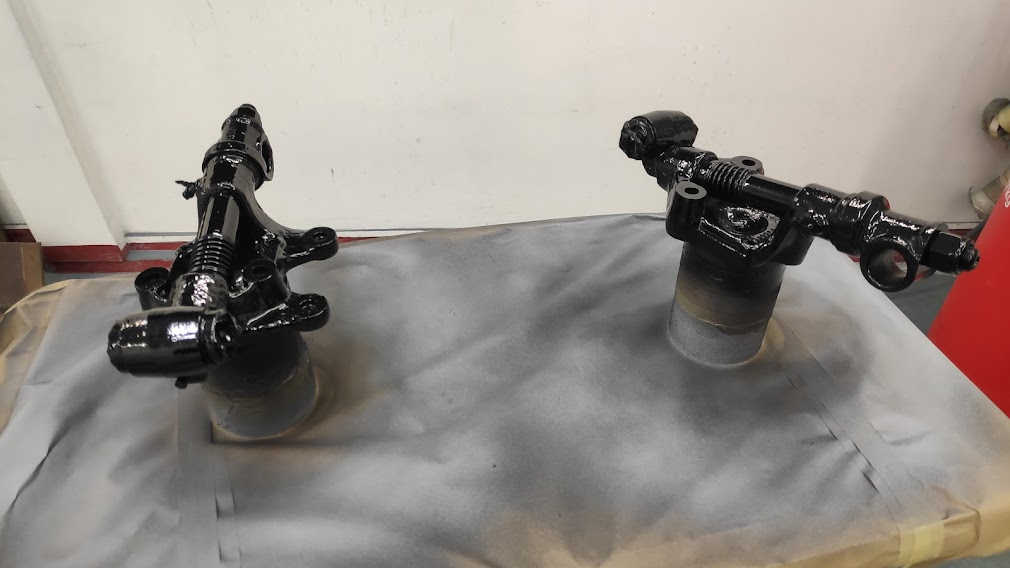
Finally it was time for the grubby bits. Any bits there were going to be reused were degreased, wire brushed, shot blast cleaned and generally taken back to bare metal. Some were treated with a phosphate coating prior to all being treated to a coat of epoxy sealer. Even the new items were keyed and epoxy painted first. Some items were perfectly salvageable and could be reused but were pitted and in need of a bit of poly spray filler, some will say not worth it, but just makes that bit of difference, and makes it easier to keep clean.


Someone emailed and asked about what I used for assembly. When its bearing grease, oils etc I always use the correct recommended or the best new or modern equivalent. For assemble the larger suspension bolts etc I use either the good old favourite copper grease or a graphite assembly paste, the correct red rubber grease for rubber items than need it, but for the general nuts bolts, all captive nuts on the body etc , these get a squirt of the lithium white grease. It really nice light assembly grease that gives a good degree of assembly protection and it wipes off easy not to leave marks on fresh paint.
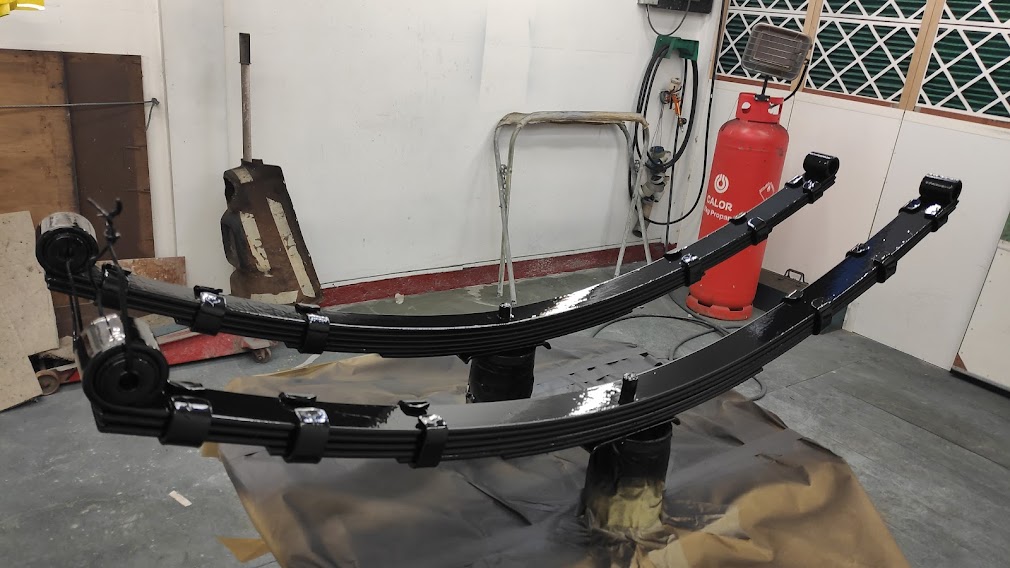
Then all the items were given a coat of 2k satin black. This dries initially with a gloss but then over the day dulls off to give a satin gloss look.
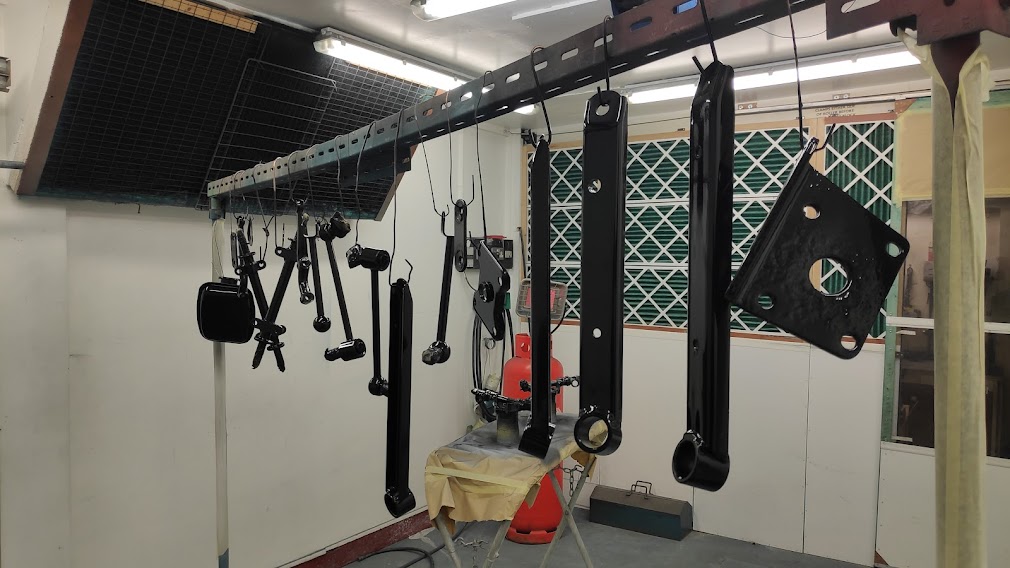
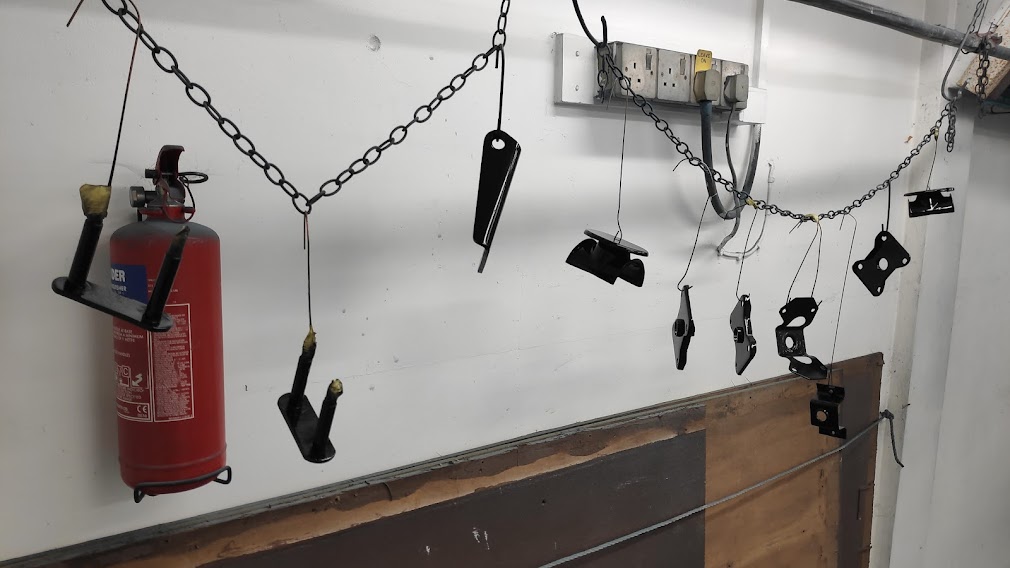
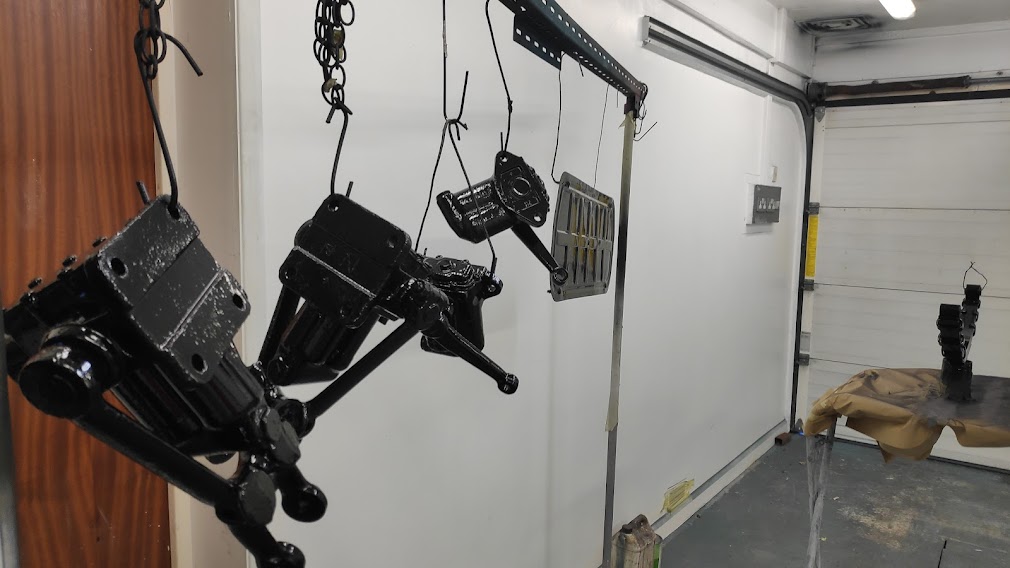


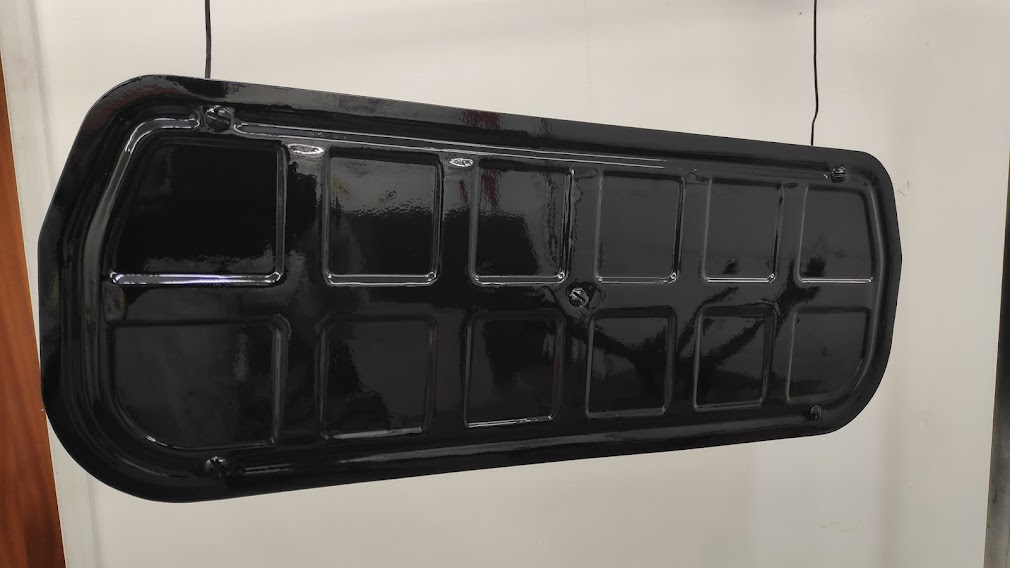


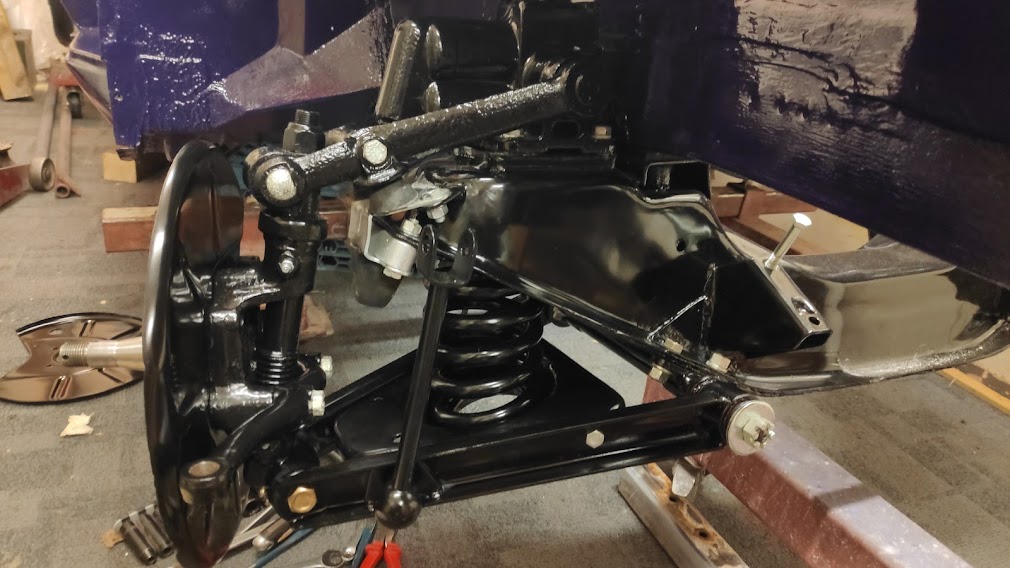
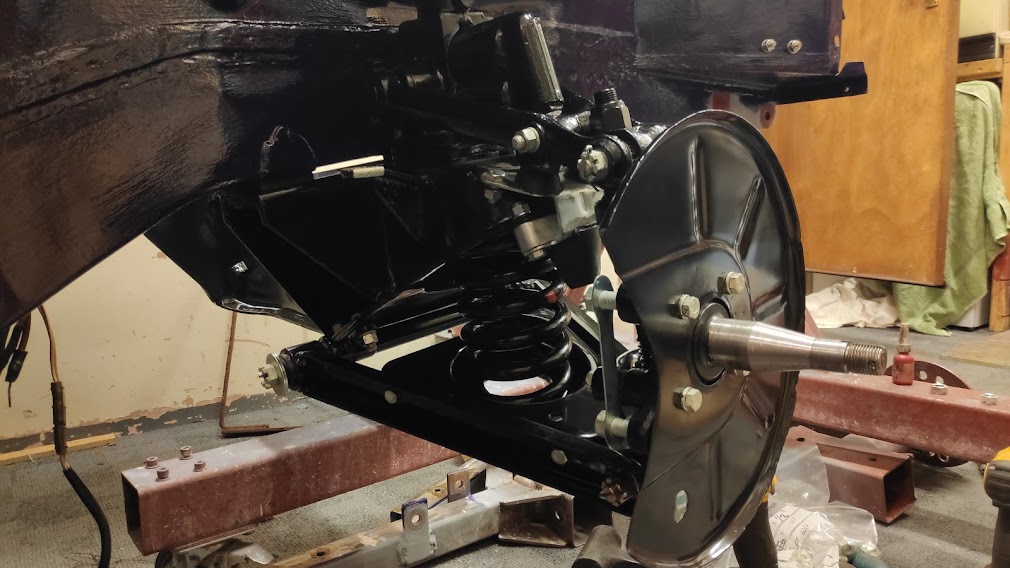
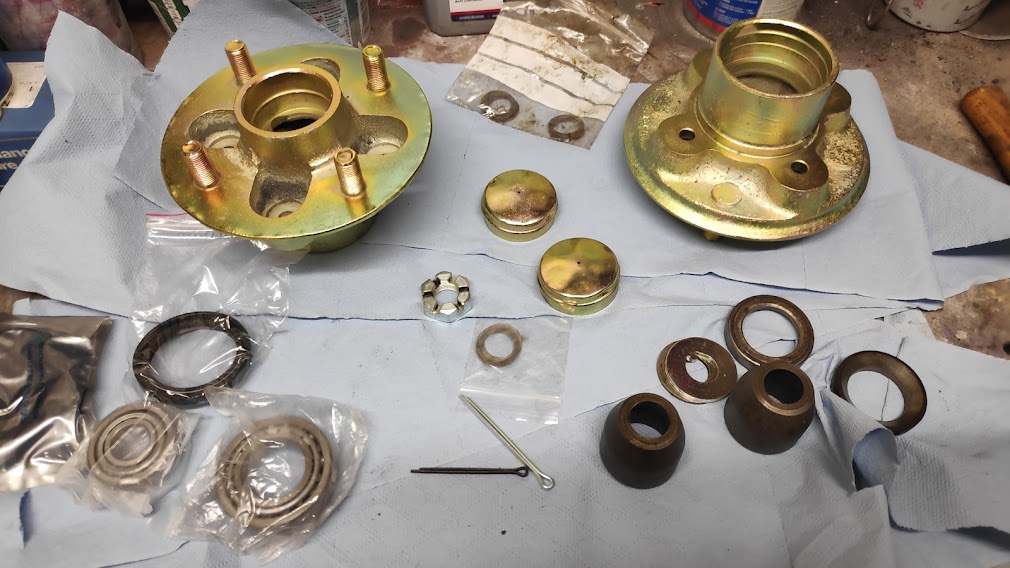
Everything was treated to new rebuild kits, bearings, seals, bushes and rubber items. All of the bits not painted were zinc plated either silver or gold, to try and give some sort of protection and of course appearance.


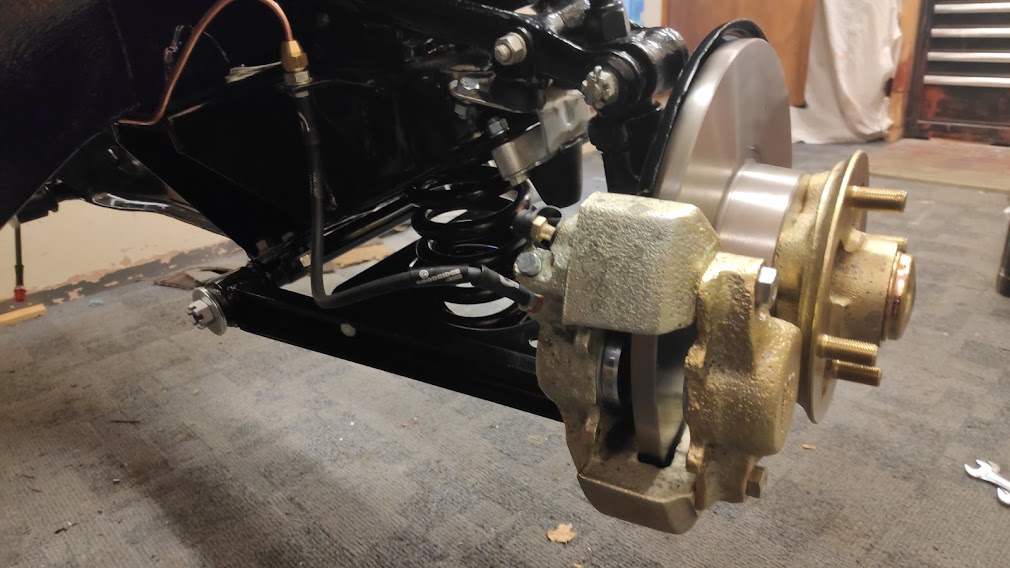

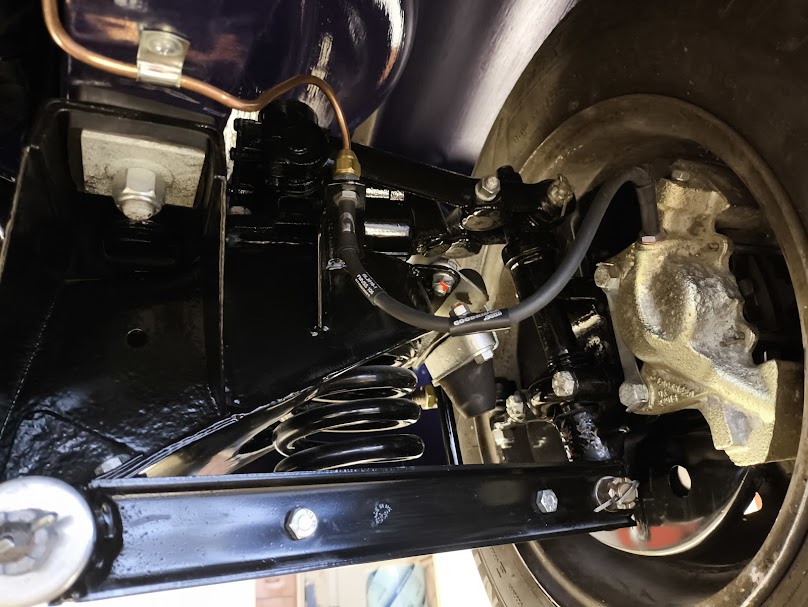
New brake pipes were Goodrich, S/S but black finish to keep up the OE appearance.
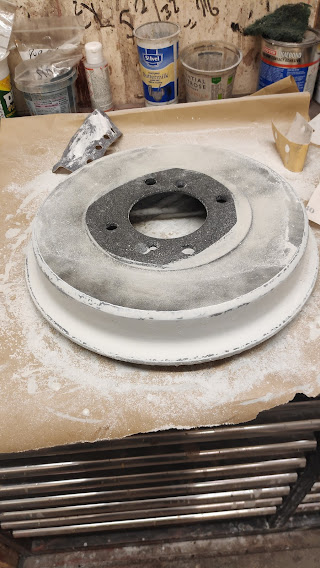
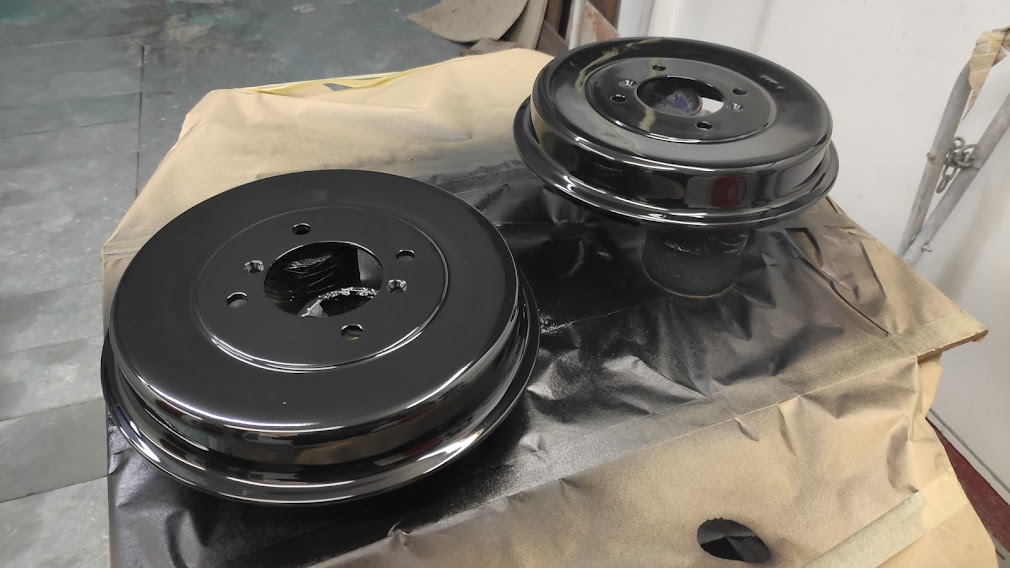
Axle got a good steam clean and then wire brush prior to spraying. Cover removed ready for the new copper shims and thrust washers, and fitted


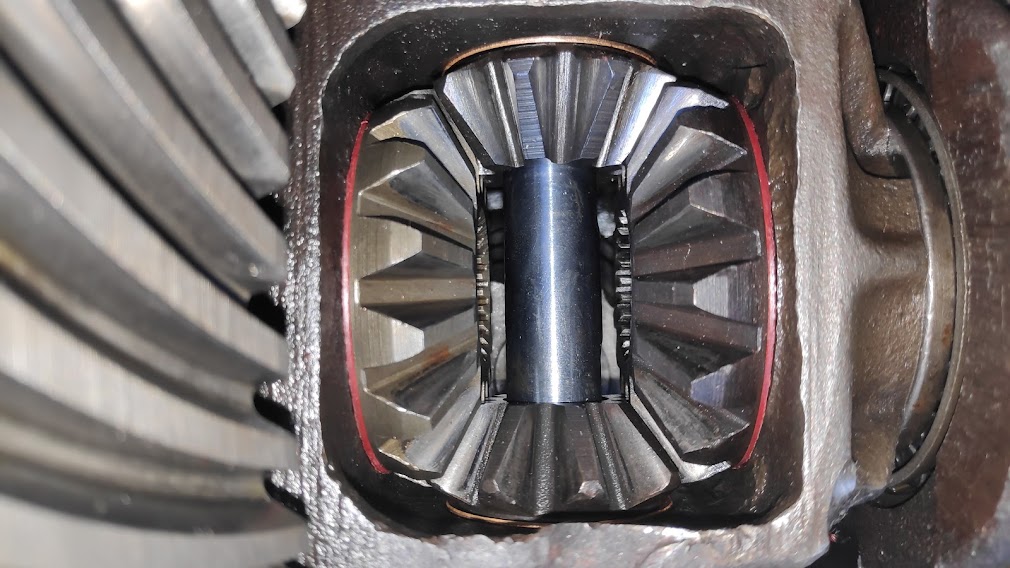

And fitted, new seals, bearings etc. Also as is the norm the plastic breather was broken, Land Rover do a copper item with a non return ball valve fitted, in case the Landi gets rolled. Not a perfect thread match however the threads are so similar the the new brass item screws in nicely with a bit of thread sealant.


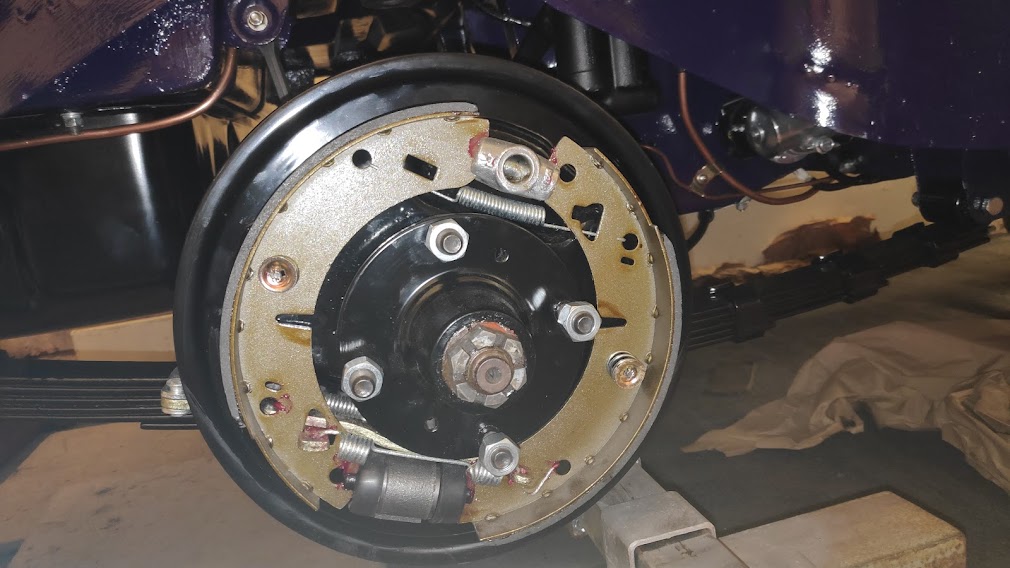
All the items have been zinc plated and or painted with 2k satin black. Had to get a new mix and this lot seems to have a bit more gloss than I wold like, but its underneath so not too much of an issue. Rear brake rebuilt, and just the hub nut to torque up and split pin to fit.

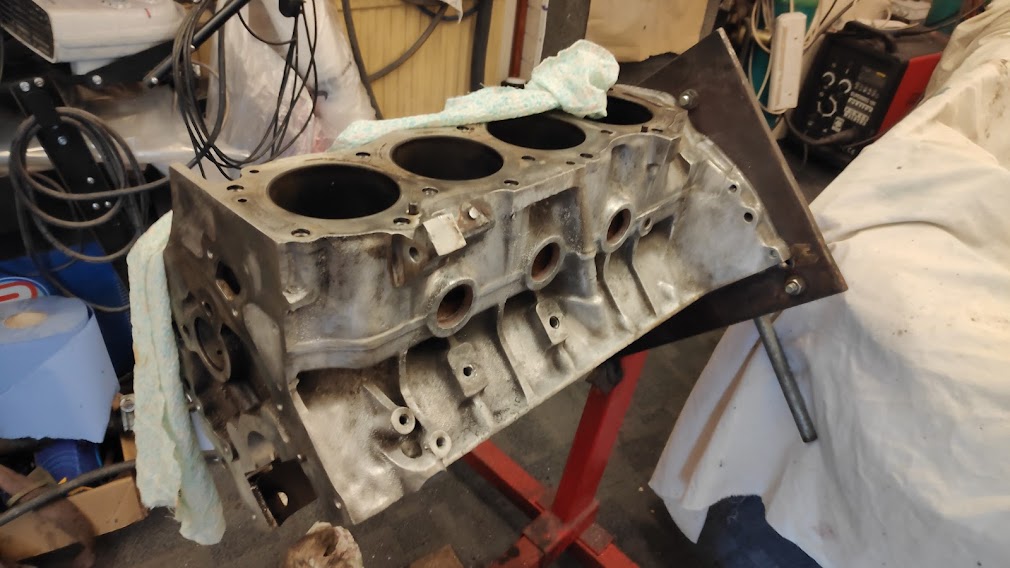
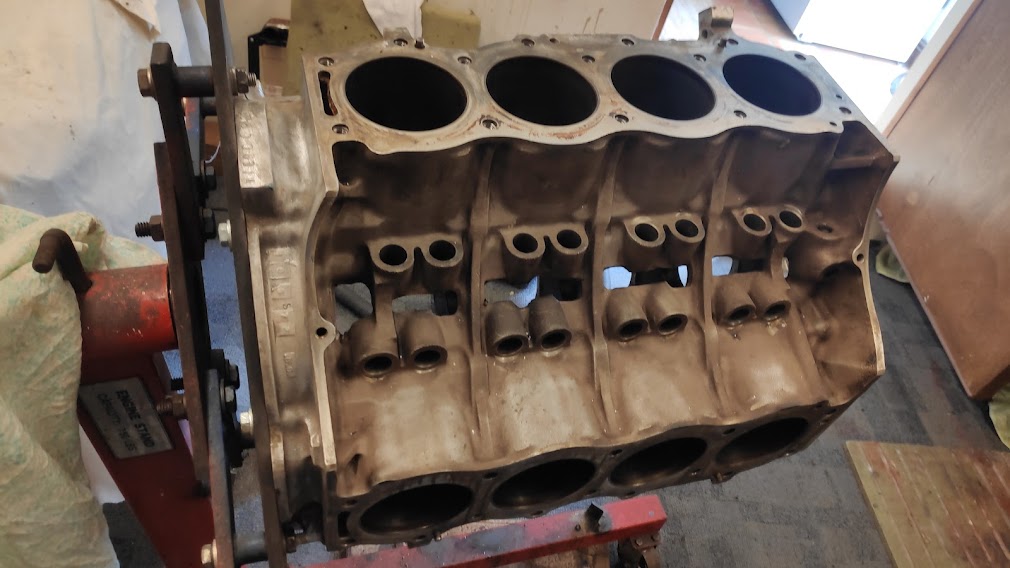
And finally on to the engine and running gear. The engine block looked quite good so it was taken to RJ Payne in Whitney for assessment. Can’t recommend these chaps enough, old school engineering workshop, and years of knowledge. Regardless of other works I supplied a new cam and shells to be fitted.
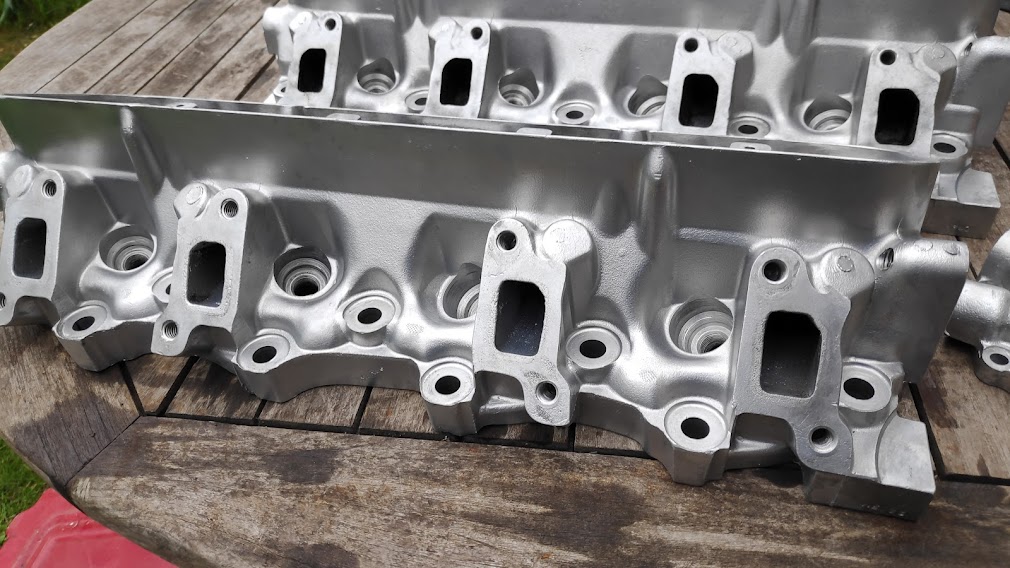
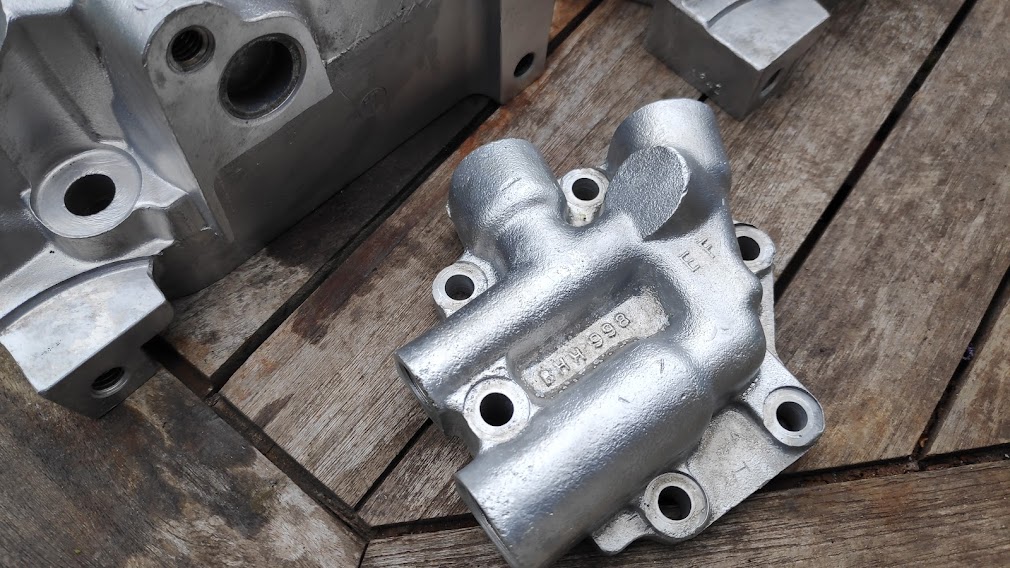
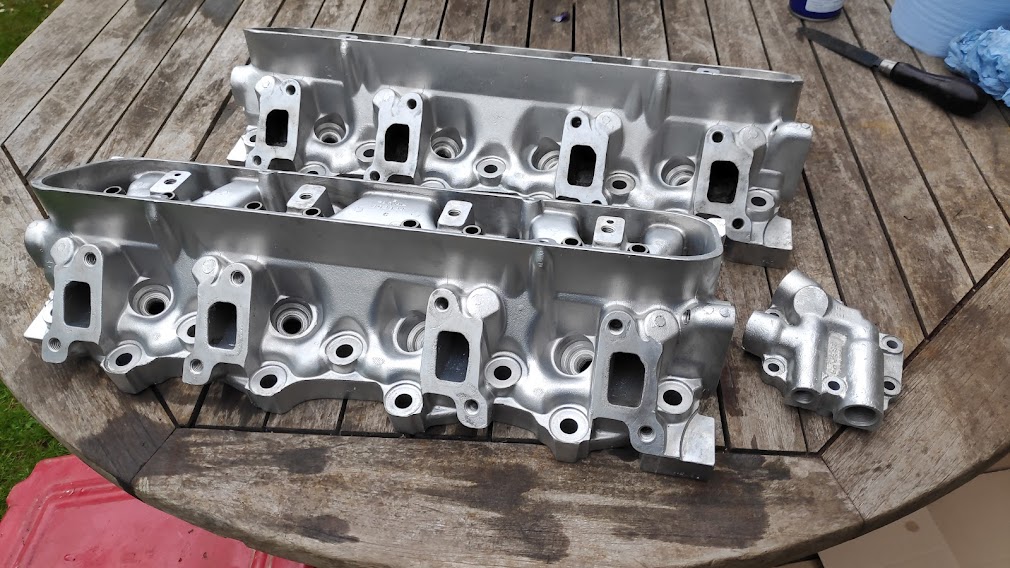
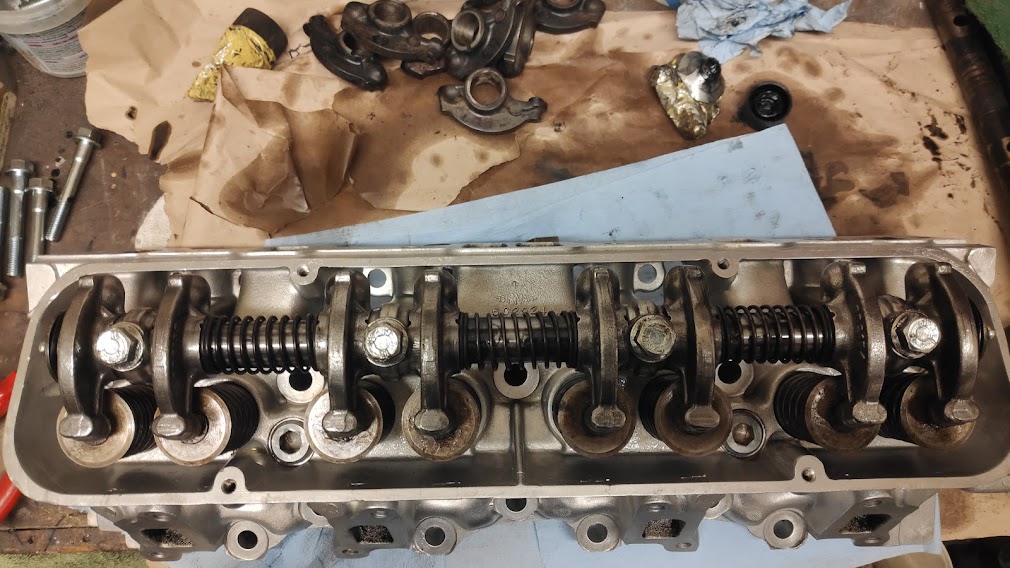
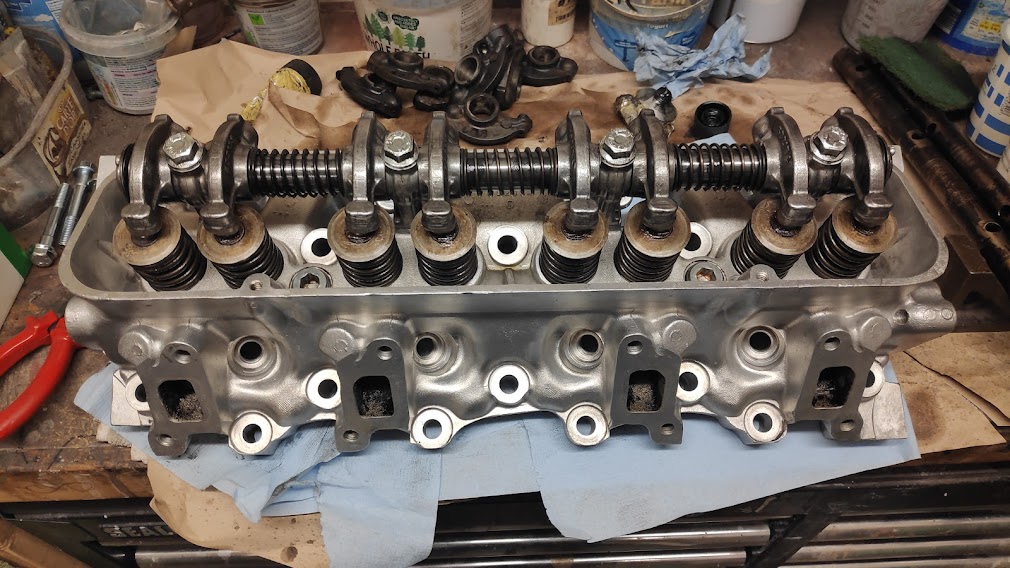
So while I was waiting the vapour blast cabinet was fired up again and I worked on getting the heads and other alloy components in decent condition. The cast items came up really nice despite their original condition.
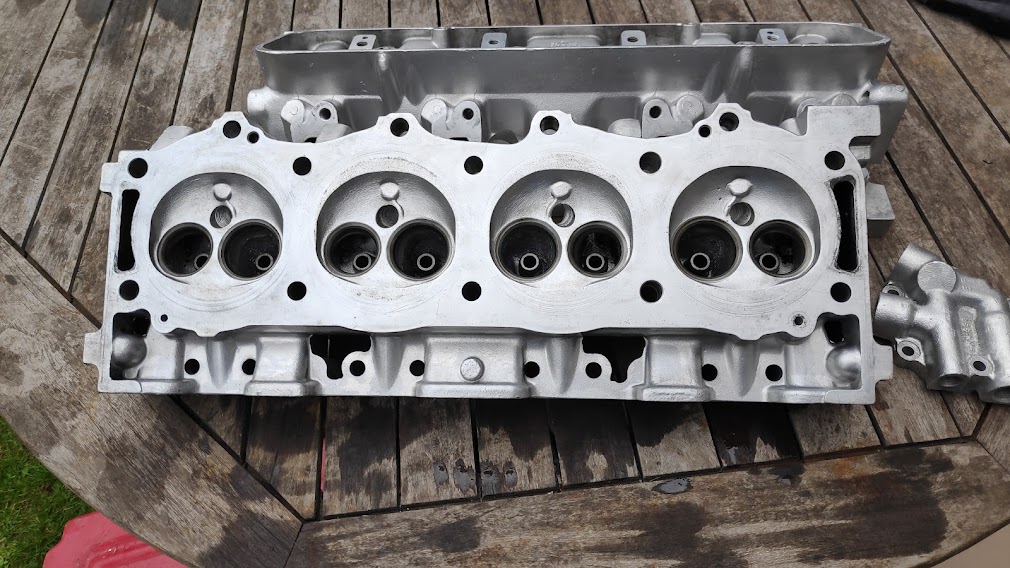
Valves were in good condition so these were cleaned and lapped in, new OE springs fitted.


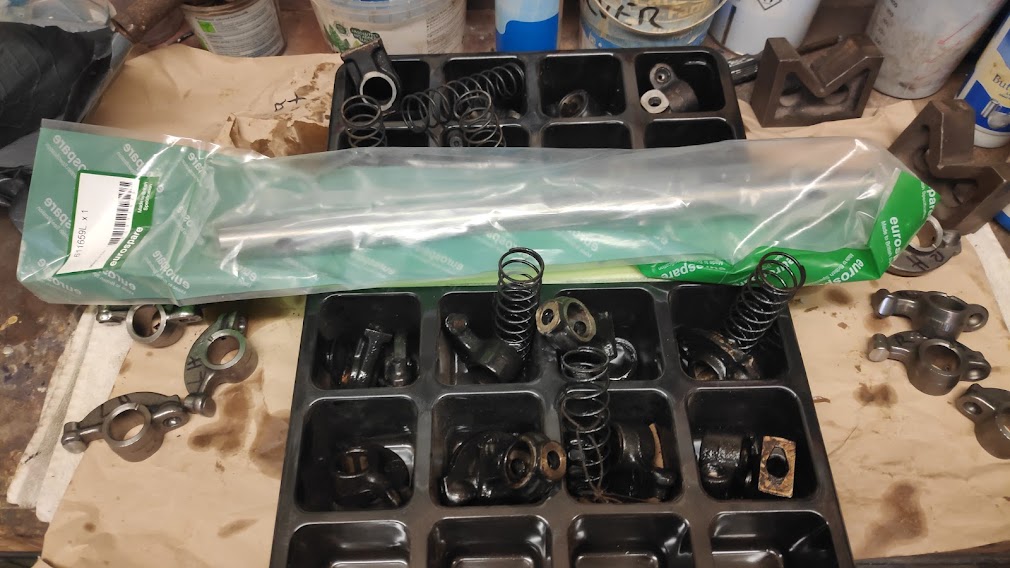
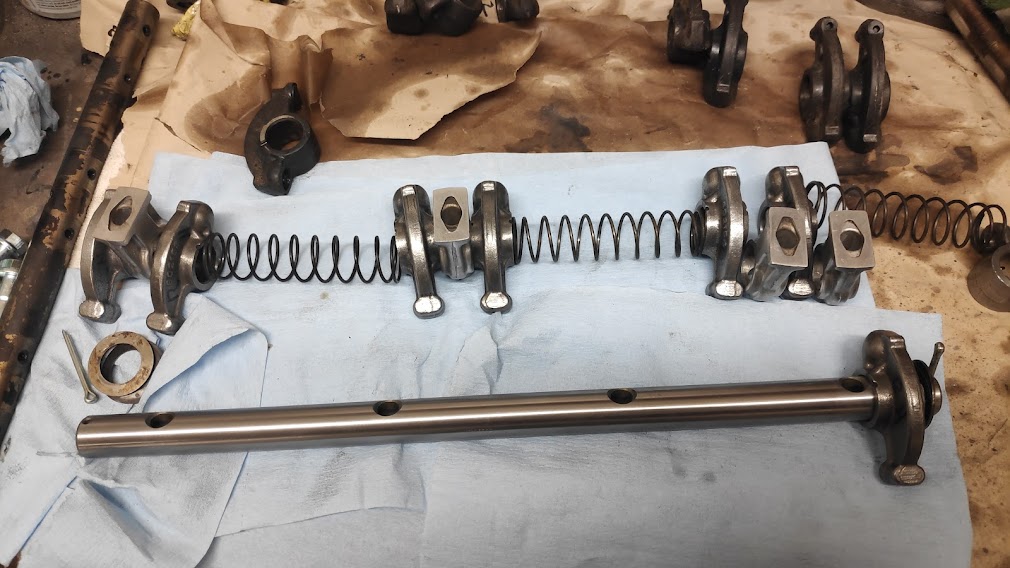
The rocker shafts and rockers were worn too far to recover, so new rockers and shafts were assembled, treated to a coat of engine assembly paste and readied to fit along with all of the engine bolts cleaned and zinc plated, or renewed.
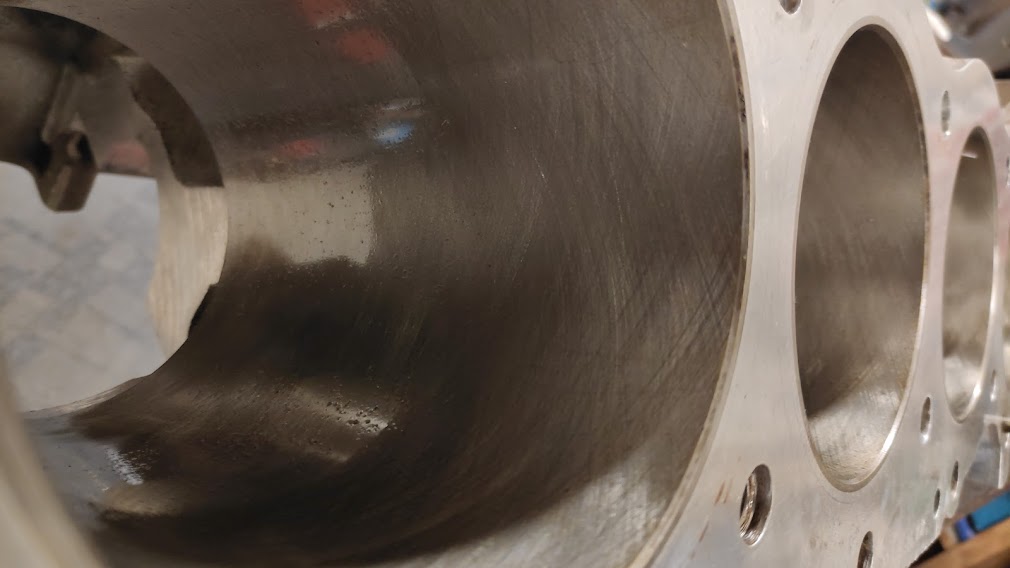
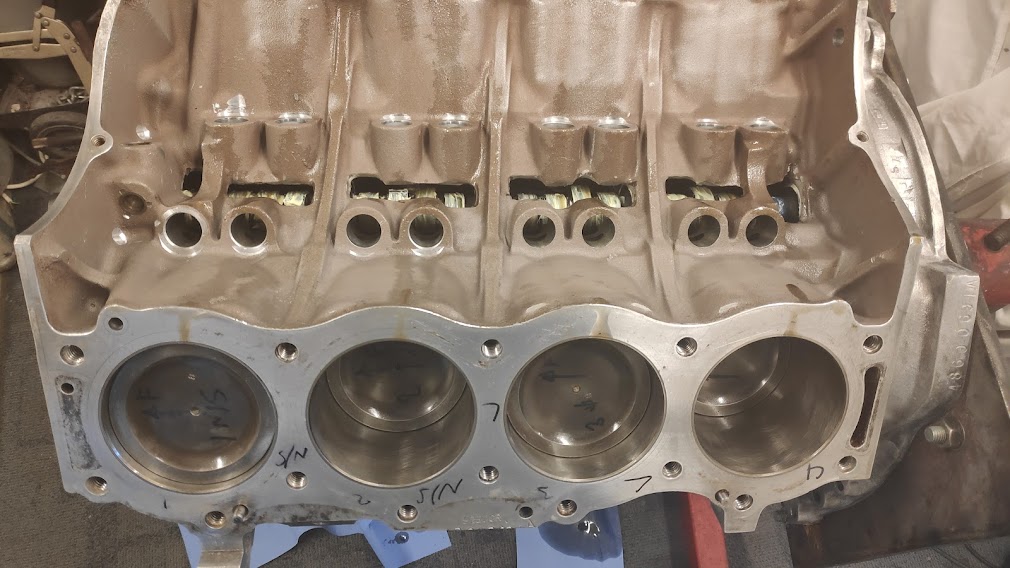
Good news from RJ Payne, the block and crank were more or less perfect, with no wear, so the block and bores had a hone and glaze bust and the crank journals had a polish. Block mounted and rebuild started.


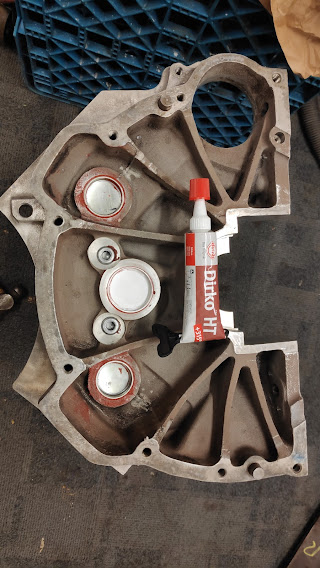
Core plugs fitted with OE sealant, Cam treated to plenty of cam lube ready for break in.
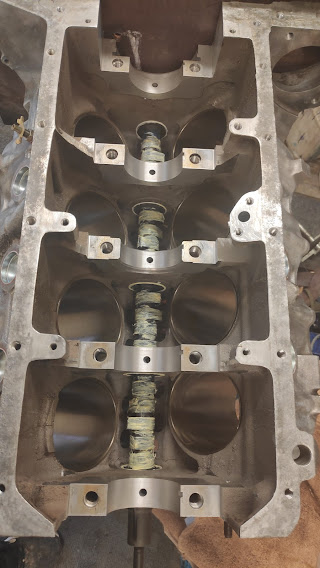
New rings all gapped, what a tedious job, new shells ready to go, plasti gauge checked the shell and journal clearances and well within tolerance.


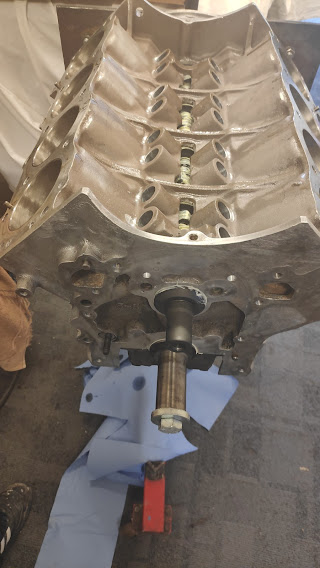
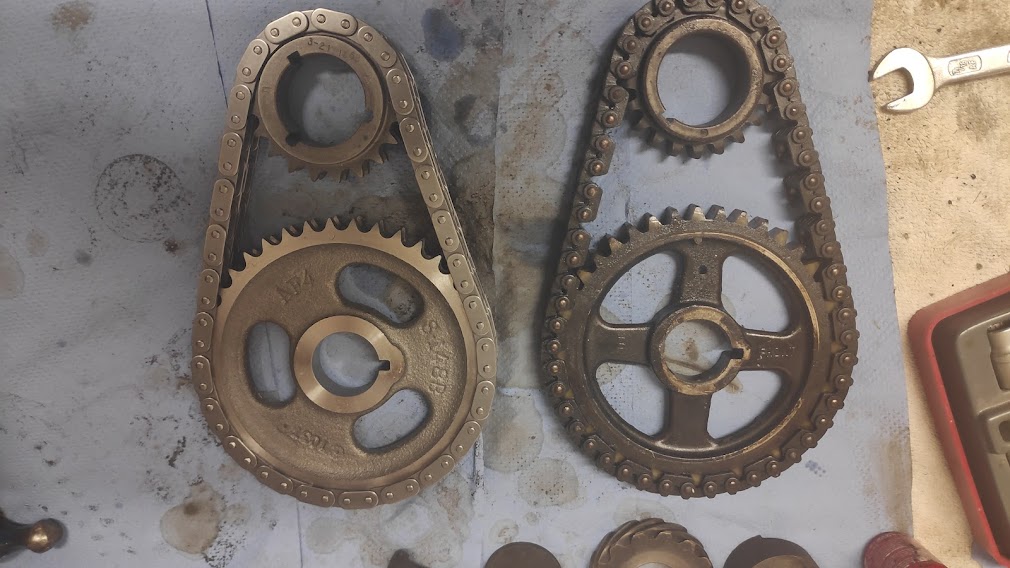
Decision was made to go with a Cloyes true roller timing chain and gear set up. Bit overkill but defo stronger and a bit less prone to wear that the nylon plastic gear normally fitted. Also the chain is a true roller type, as per the description really, rather than the link type fitted. Timing cover and water pump fitted and new lifters put into soak for 24hrs. Not in the pic are the new heav=y duty push rods. These are actually cheaper than the standard OE items, so it seems silly not to upgrade to these. Also new oil pump gears, pressure relief spring and plunger fitted, base packed with Vaseline and cover bolted up.


Can’t believe it’s been a year since the last write up but issues beyond my control put paid to the best part of 6-8 months since this last set of pics. Knee operation wiped out 8 weeks of doing anything, and then the conversion of my shed into a bakery kitchen for my daughter put paid to the best part of 5 months, pics of that in the cake section.
I also didn’t take many photos of the heads rebuild or any of the final assembly, but it was all straight forward. That was until the exhaust section.


This is really the only pics of the engine assembled, and was more to show the repairs and strengthening of the manifold flanges and the poor fit of the exhaust “Y” section.


So not the prettiest of cast welding but its solid and leak free and I don’t think will ever break. I welded tube nuts to the flanges to accept longer exhaust manifold studs; also the longer tube nuts were shaped to the manifold and welded to help support the flanges, as we all know the break off easy. The thin off side section of manifold is really thin casting below the flange, so to help strengthen this area a sleeve was formed to fit tight up against the manifold and under the flange and then welded again
And then came the “Y” piece of exhaust system. As with much or the parts I have found over the months the quality of products available is absolutely cr@p. Supplies just don’t care and don’t give a toss if you complain; I have sent stuff back only to find others suppliers are supplying the same items yet quoting it better than other suppliers, absolute rubbish. With the best fitting side of the pipe bolted up snug to the manifold you can see the amount the “Y” piece was out. I was able to solve this easily but cutting the offending side and modifying it and welding it up again. I pity those who can’t weld or do this as the time it took me to get it right would cost a fortune.


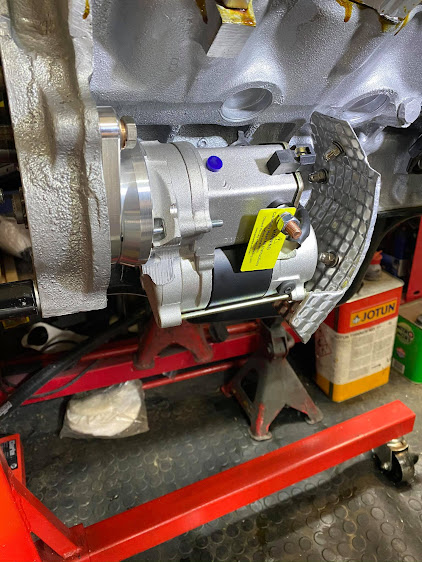
Manifolds were treated to a few light coats of Hi Temp black and a new Hi torque starter motor fitted. A new heat shield was purchased only to be returned due to the rubbish fit and finish, so I made my own. Not sure if it will be big enough to keep the heat away but we will have to see.


And fitted ready for the install.

And in the car finally. Fans were treated to a few coats of nice bright yellow 2k, new motors to match. Usual bits replaced, oil cooler, heater valve, new coolant pipes in the inlet manifold and the one under etc. Rad was re-cored by Bagshot Rads and a hi bigger tube matrix was refitted and soldered in to help with the cooling.


Any bits reusable have been zinc plated, silver or yellow (cad now banned so it’s the best we can do) Some of the bits do have some old pitting which can be seen under the plating, this was always a resto, using as much of the original car as possible, and at least they fit.


I have gone for an electronic distributor, with a remote amplifier, this was the engine should look as stock as possible. I have also wired out the resistor cable in the loom for a continuous 12v supply to the new distributor. I mounted the heat sink and amp down below the coil position, keeps it out the way and in good air flow, and again hides the modern electronics to keep it looking OE as far as possible. A few clips fitted into the vacant threaded holes into the head keep the cables tidy


And to finish it off the system was filled with 20/50 and treated to break in oil additive, the priming tool fitted to the battery drill and, 45-50 psi at the gauge. Good flow from the rockers means we now have oil in all the galleries and around the engine for the first fire. Dash and items covered in the fitting up section.
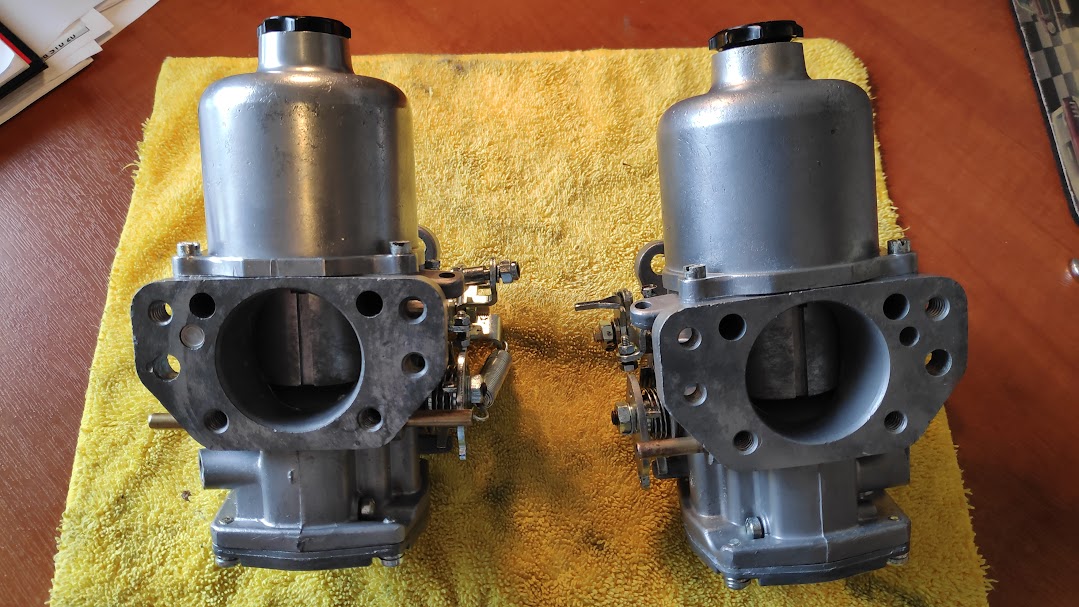
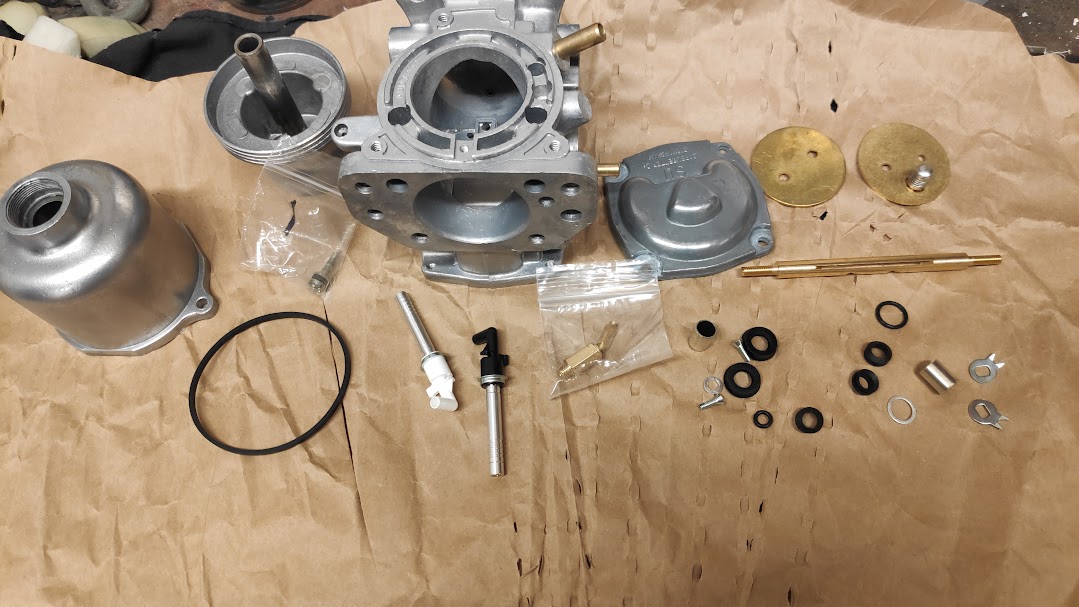
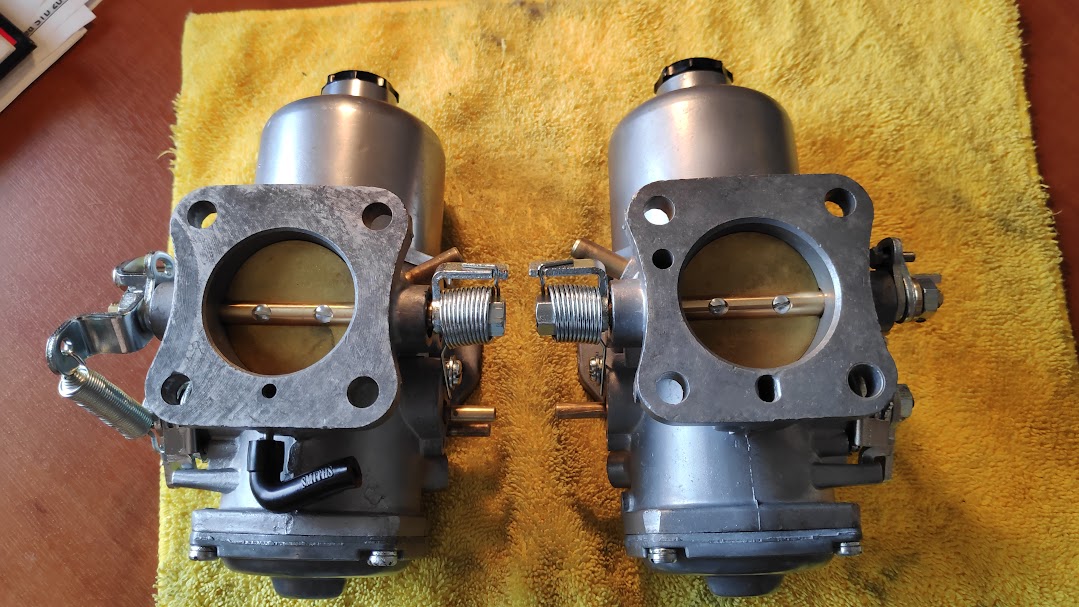
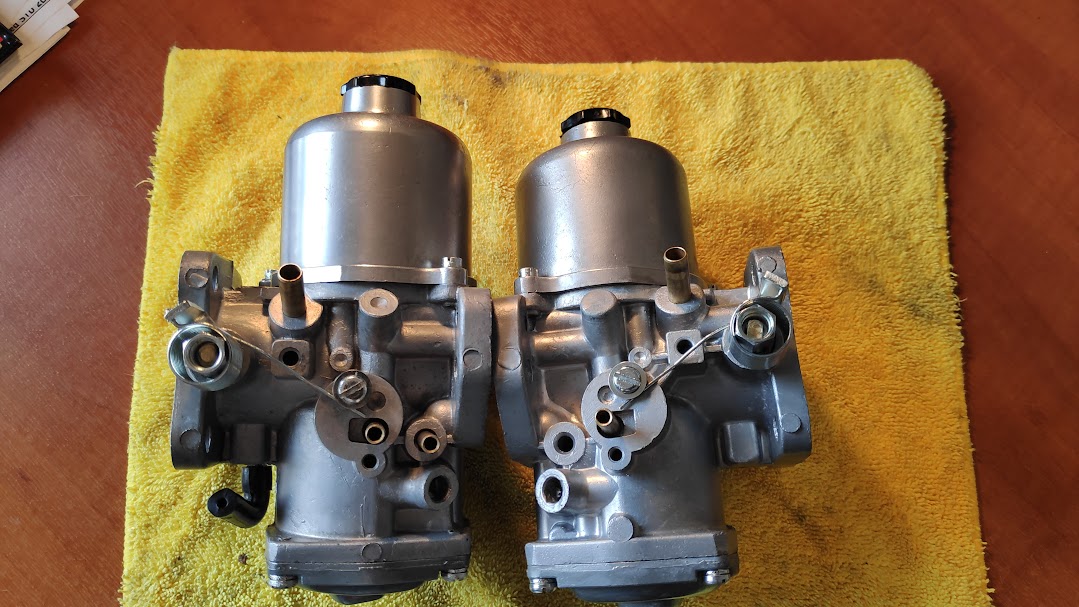
Carbs were vapour blast cleaned and all fixtures and fittings zinc plated. Cant remember where I found it but one of the older SU’s uses the same dia throttle discs as the V8, without the dreaded pop off valves. I suppose I could have soldered these shut but this was a simpler method. And the carbs rebuilt ready for fitting.

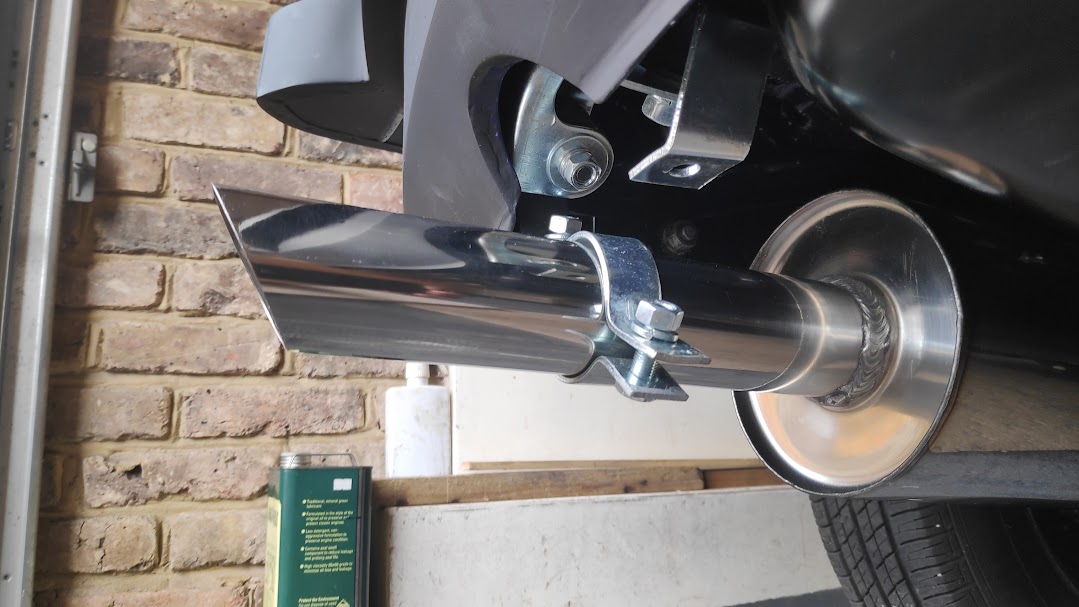
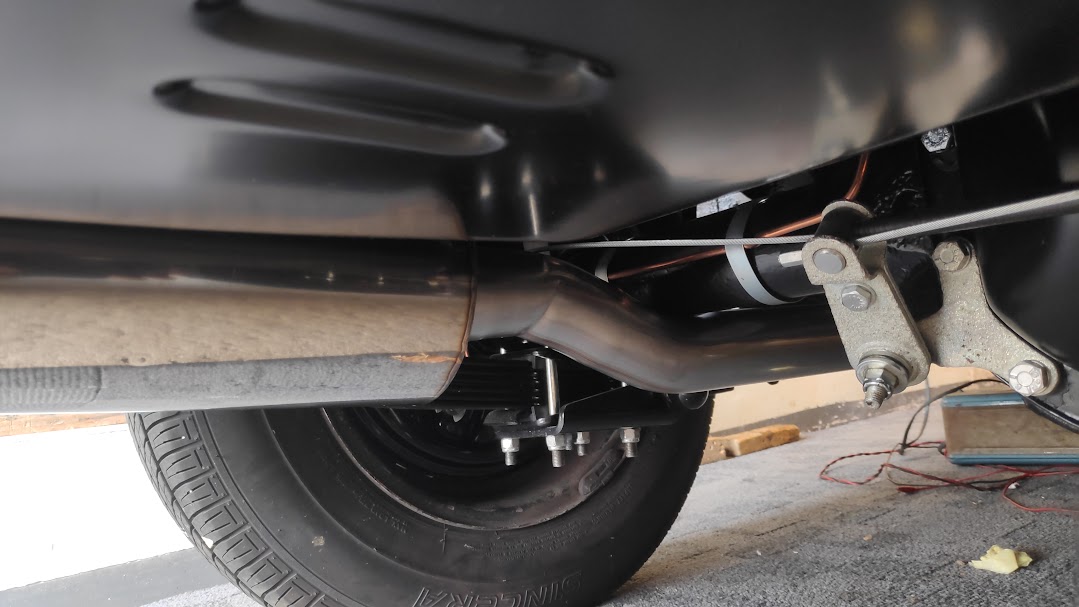
And on to one of my constant moans about the crap quality of parts these days. The rear exhaust section , brand new from one of the 2 major leading suppliers, hit the rear axle meaning it wouldn’t go anywhere near the rear mounting, the bend was just all wrong, and to top it all off the slashed rear tip section was completely out of rotation. Rather than send this back and have another useless piece sent I took to modifying the rear section. Pictures of the mod to follow.

And more or less together with the air filter tin ware refurbished. Not shown here but I did give in and purchased a correct colour throttle cable, now fitted. The fuel filter is not correct but a temp unit to catch any crap and debris while the system is new. Pointless wasting money on the correct item at the moment. This will be replaced once the second fill of petrol has gone in. I have also found in my stash of old stuff some servo hose with a diamond or pattern on it that is similar to the original, not as heavy print as the OE stuff but enough to give a slight resemblance. Again that is in the “to be done “section.


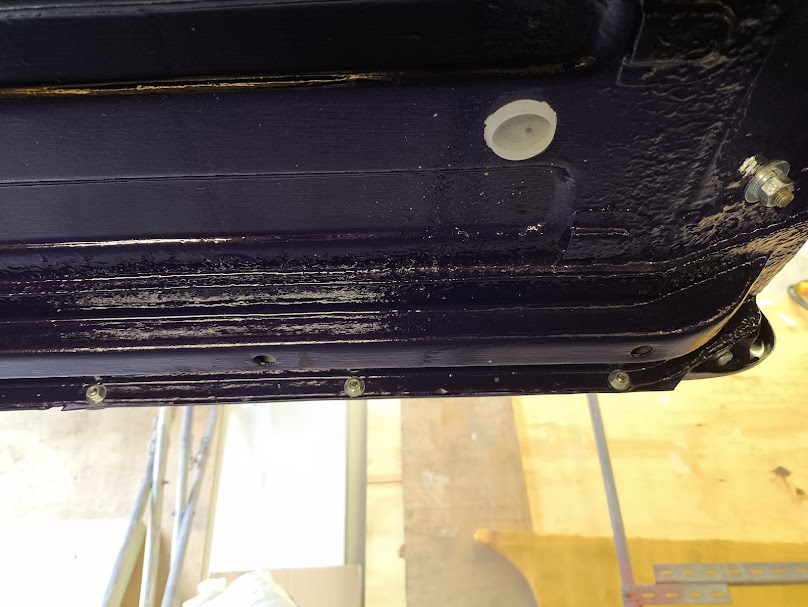
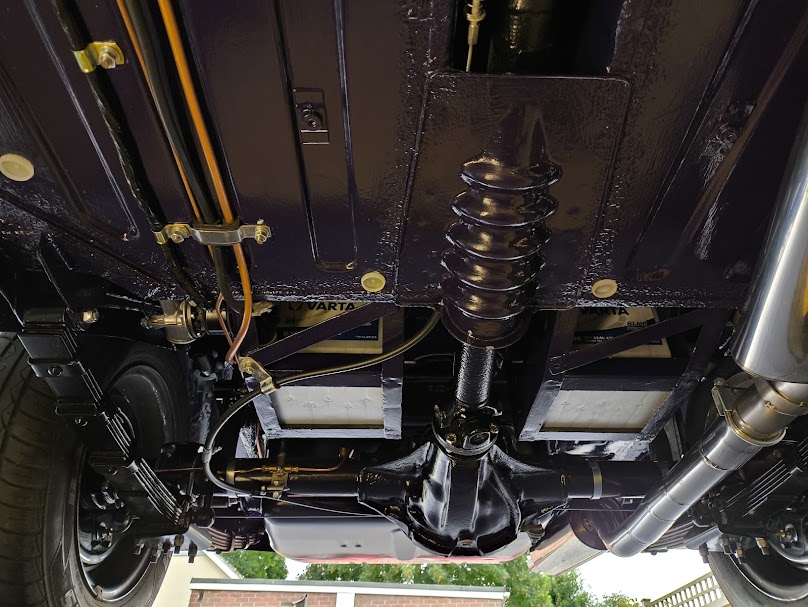
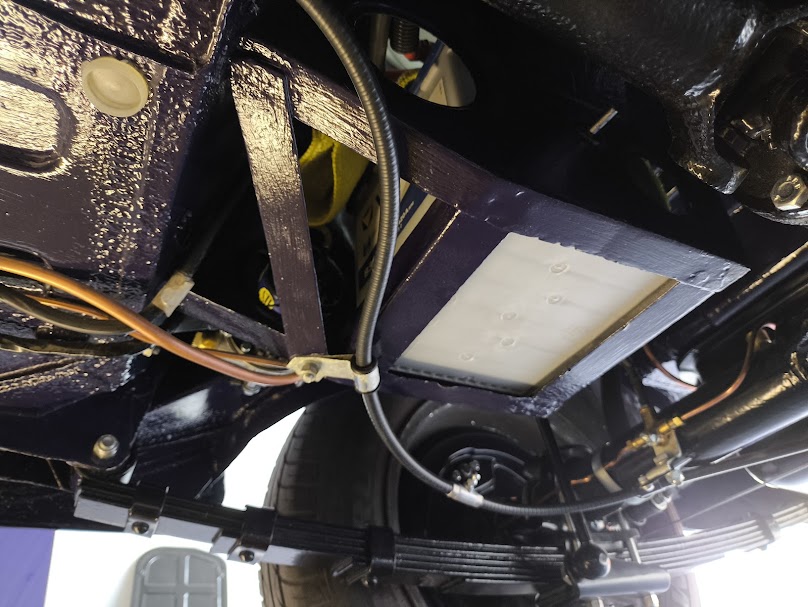
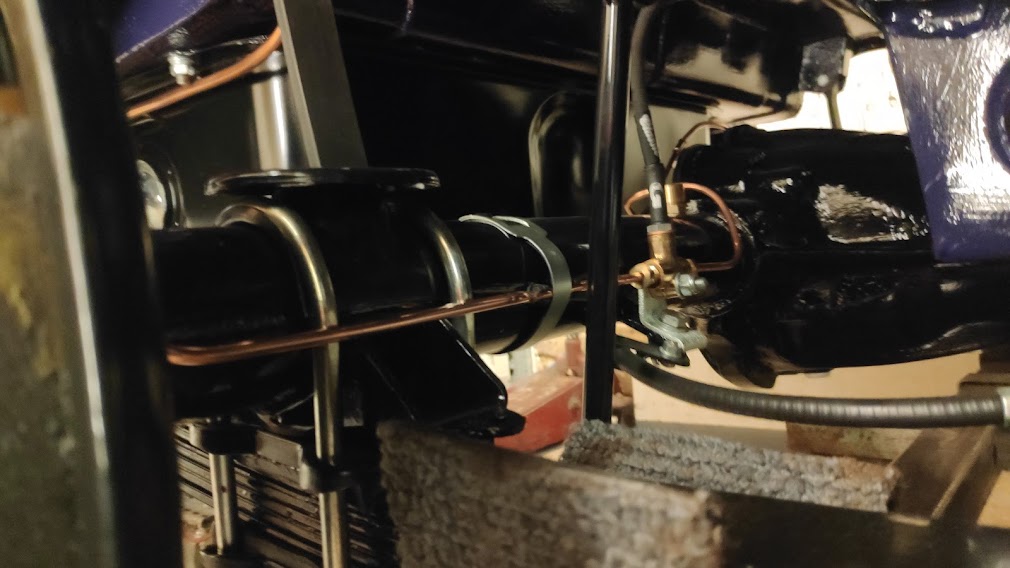
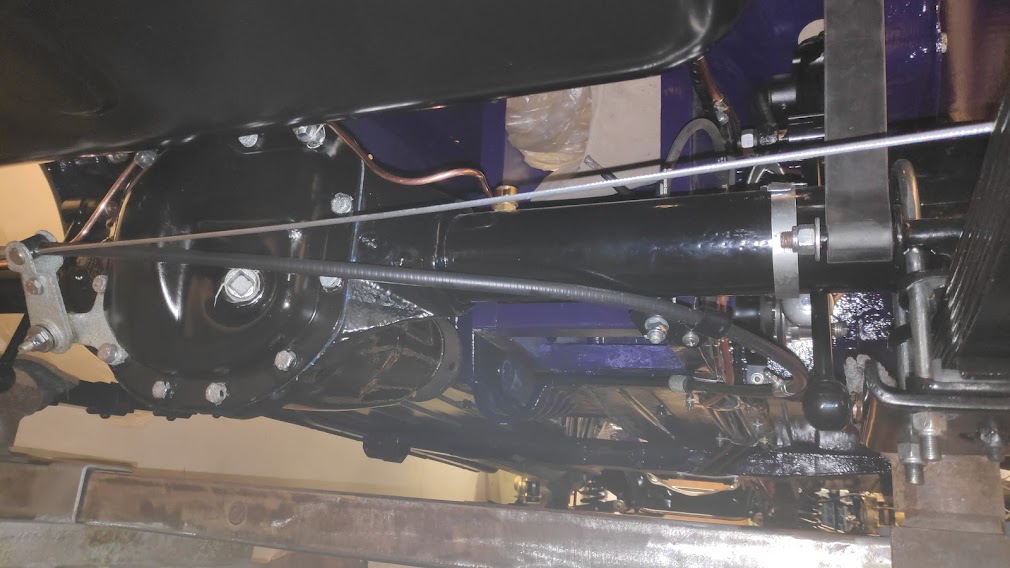
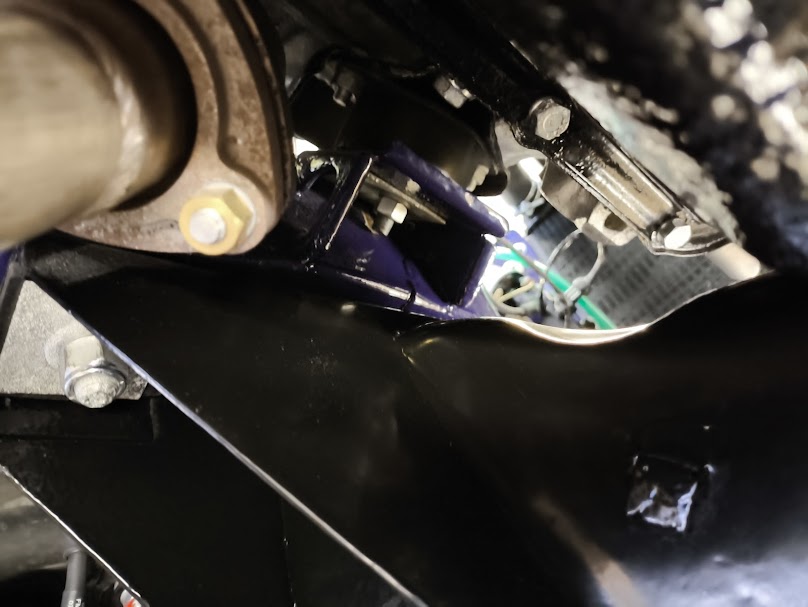
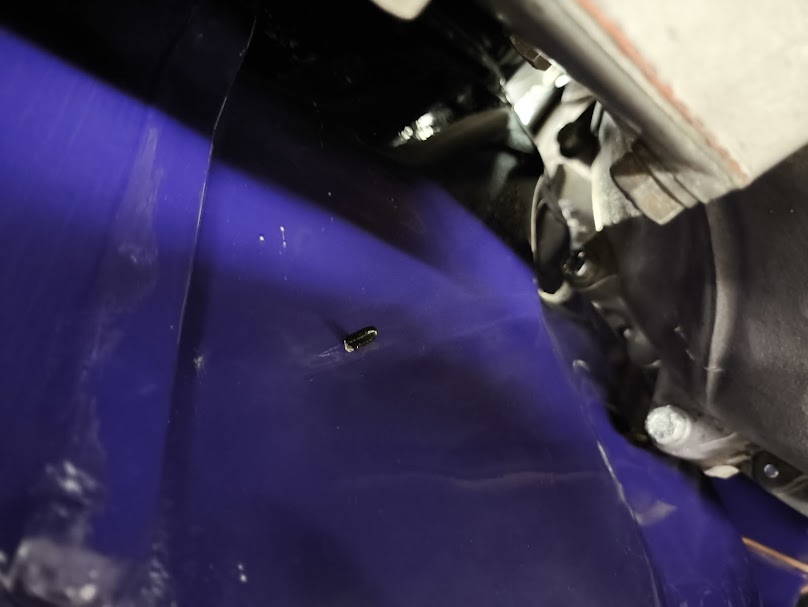
And to finish here some underside shots of the car, not sure if its finally finished but this will do until the end. Needs a dust and clean but I’m thinking it’s there. White grease can be seen on some of the assembled items. I’m not going to wipe it all off as it gives some degree of protection and adds a bit of character, I’ll leave that to whoever buys it to decide.


Correct V8 rad duct supporting panel, rare find. Rad recored with heavy duty core.


Hi torque starter motor, and small detail like rubber caps over carpet self-tappers, for those of you who have ripped finger and knuckles on these know how important they are.